MRI-guided focused ultrasound (MRgFUS) presents a novel, non-invasive avenue for treating cervical dystonia, offering potential symptom relief and improved quality of life for patients.
Understanding Cervical Dystonia
Cervical dystonia, the third most common movement disorder, presents as involuntary muscle contractions in the neck, causing repetitive movements and painful postures. These contractions can significantly impair daily activities and diminish a patient’s overall quality of life. While various treatments exist, including botulinum toxin injections and deep brain stimulation (DBS), they aren’t always fully effective or come with potential side effects.
The condition’s impact extends beyond physical discomfort, often leading to emotional distress and social limitations. Currently, managing cervical dystonia requires a multifaceted approach, tailored to the individual’s specific symptoms and severity. However, the search for less invasive and more targeted therapies continues to be a priority for both patients and clinicians.
Given the disabling nature of cervical dystonia, exploring innovative treatment modalities like MRgFUS is crucial. The potential for a non-invasive option that can provide substantial and lasting symptom relief represents a significant advancement in the field of movement disorders, offering hope for improved outcomes and a better quality of life.
The Rise of Non-Invasive Treatment Options
Traditionally, managing movement disorders like cervical dystonia involved invasive procedures such as deep brain stimulation (DBS), requiring surgical implantation of electrodes. While effective for many, DBS carries inherent risks associated with surgery, infection, and potential device malfunction. Consequently, there’s a growing demand for non-invasive alternatives that offer comparable therapeutic benefits with reduced risks.
MRI-guided focused ultrasound (MRgFUS) emerges as a promising solution, aligning with this trend towards less invasive treatments. Approved for essential tremor and Parkinson’s disease, its application to cervical dystonia represents an exciting expansion of its clinical utility. MRgFUS avoids surgical incisions, minimizing patient trauma and recovery time.
The appeal of non-invasive options extends beyond safety; they often present a more accessible treatment pathway for patients who may be unsuitable candidates for surgery. This shift reflects a broader movement in medicine towards patient-centered care, prioritizing treatments that are both effective and minimize burden on the individual. MRgFUS embodies this philosophy, offering a potentially transformative approach to dystonia management.
Introducing MRgFUS: A Novel Approach
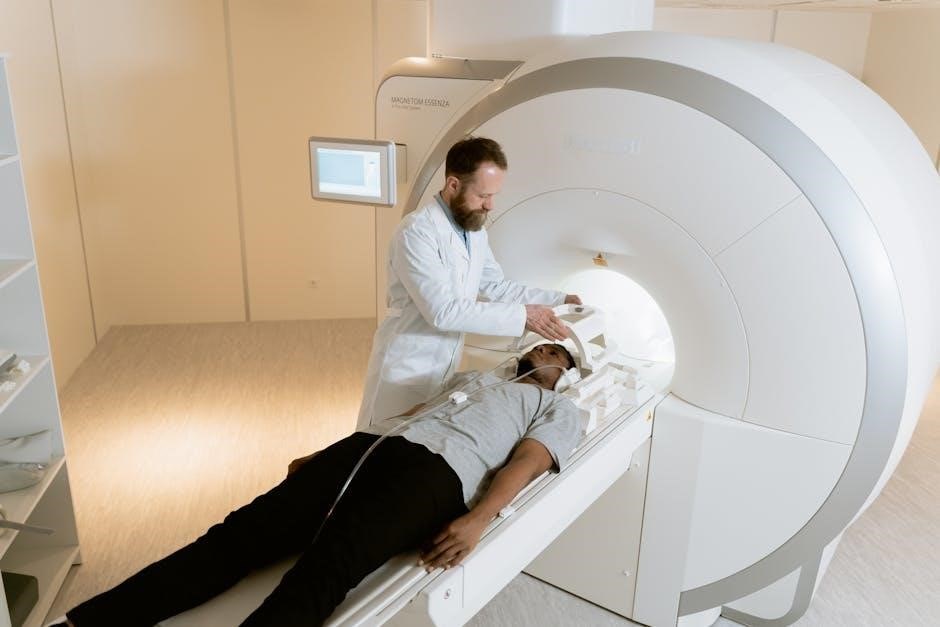
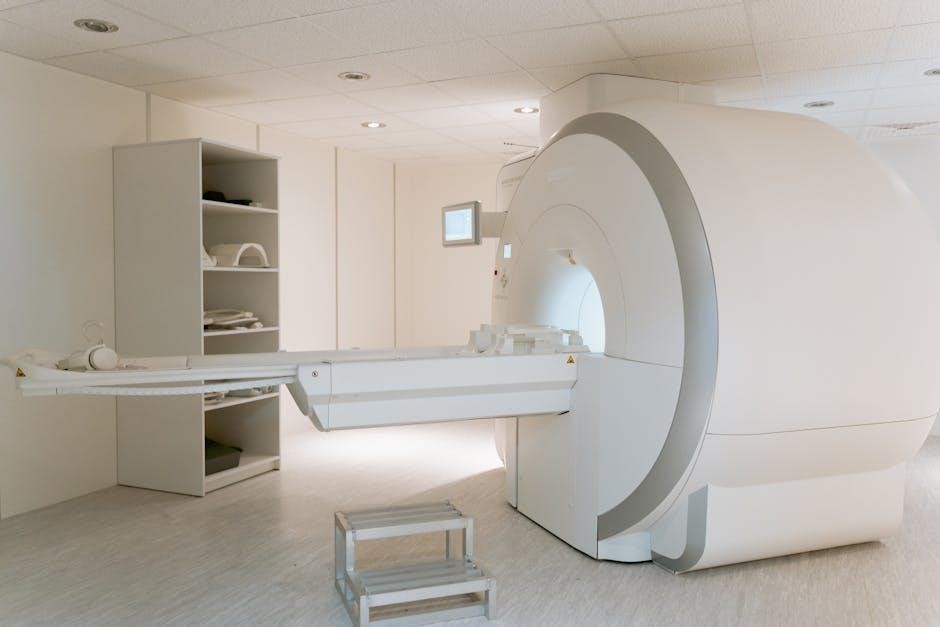
MRI-guided focused ultrasound (MRgFUS) represents a paradigm shift in the treatment of cervical dystonia, offering a non-invasive alternative to traditional methods like deep brain stimulation (DBS) or lesioning procedures. This innovative technique utilizes precisely focused ultrasound waves to create a thermal lesion within targeted brain circuits, specifically the globus pallidus or subthalamic nucleus.
What distinguishes MRgFUS is the integration of real-time MRI thermometry. This allows clinicians to accurately monitor temperature changes during the procedure, ensuring precise targeting and minimizing damage to surrounding tissues. The MRI provides detailed anatomical visualization, guiding the ultrasound beams with exceptional accuracy.
Currently, several clinical trials are underway to evaluate the efficacy and safety of MRgFUS for cervical dystonia, building upon successful applications in other movement disorders. Early findings suggest the potential for significant symptom relief and improved quality of life, positioning MRgFUS as a potentially transformative therapy for those affected by this debilitating condition.

The Technology Behind MRgFUS
MRgFUS combines focused ultrasound energy with real-time MRI guidance, enabling precise targeting of brain structures like the globus pallidus and subthalamic nucleus for treatment.
How Focused Ultrasound Works
Focused ultrasound utilizes acoustic energy to precisely target specific deep brain structures without requiring incisions. Numerous transducers generate beams of ultrasound that converge at a defined focal point within the brain. This convergence creates a localized increase in temperature. The principle relies on the absorption of ultrasound energy by the tissue, converting it into heat.
Crucially, the intensity is carefully controlled to induce a therapeutic effect – typically, a small, well-defined lesion. This lesion disrupts the abnormal neural circuitry contributing to the symptoms of cervical dystonia. The skull, however, presents a challenge as it absorbs some of the ultrasound energy. Therefore, patient preparation, including scalp shaving and cooling with circulating cold water, is essential. The water acts as a sound-conducting medium and dissipates heat, protecting the scalp and skull from damage.
The targeted areas, such as the globus pallidus or subthalamic nucleus, are key components of the brain’s motor circuits. By creating a lesion in these areas, MRgFUS aims to modulate the abnormal signals causing involuntary muscle contractions characteristic of cervical dystonia, ultimately leading to symptom improvement.
The Role of MRI in Guiding the Procedure
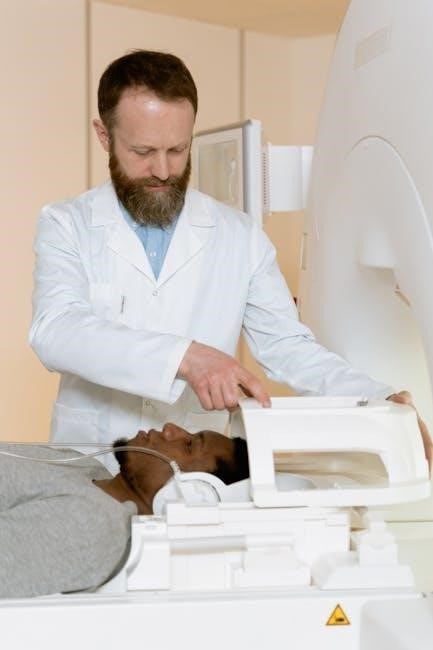
Magnetic Resonance Imaging (MRI) is absolutely integral to the success and safety of MRgFUS, serving far beyond simple visualization. It’s not merely used to identify the target brain structure – the globus pallidus or subthalamic nucleus – but actively guides and monitors the entire procedure in real-time. MRI provides high-resolution anatomical images, allowing for precise targeting of the intended focal point.
However, its most critical function is MRI thermometry. This technique allows clinicians to continuously measure temperature changes within the brain tissue as the focused ultrasound energy is delivered. This real-time temperature monitoring is paramount to ensure the therapeutic effect is achieved – creating a lesion – without causing unintended damage to surrounding healthy tissue.
The MRI’s ability to visualize the temperature distribution allows for precise control of the ultrasound parameters, adjusting power and focus as needed. This feedback loop, combining ultrasound delivery with continuous MRI monitoring, is what distinguishes MRgFUS as a highly targeted and safe non-invasive treatment option for cervical dystonia.
MRI Thermometry and Real-Time Monitoring
A cornerstone of MRgFUS safety and efficacy is the sophisticated system of MRI thermometry and real-time monitoring. As focused ultrasound energy is delivered, the MRI doesn’t just show anatomy; it meticulously tracks temperature fluctuations within the targeted brain tissue. This isn’t a post-procedure assessment – it’s a continuous, dynamic process happening during the treatment.
Clinicians observe temperature changes at the anatomical target, ensuring a precise and controlled thermal dose is delivered. This allows for the creation of a therapeutic lesion while minimizing the risk of overheating and damage to surrounding healthy structures. The system provides immediate feedback, enabling adjustments to ultrasound parameters – power levels, focal point – in real-time.
This constant monitoring is crucial for achieving optimal outcomes. It allows for personalized treatment plans, tailored to each patient’s unique anatomy and response to the ultrasound energy. Without this precise temperature control afforded by MRI thermometry, MRgFUS would not be the safe and effective non-invasive option it is today.
Current Clinical Trials & Research
Currently, four registered clinical trials on ClinicalTrials.gov investigate MRgFUS, with three ongoing, including studies related to X-linked parkinsonism-dystonia and cervical dystonia specifically.
Registered Clinical Trials on ClinicalTrials.gov
As of today, March 8th, 2026, a search of ClinicalTrials.gov reveals four registered clinical trials focusing on MRI-guided focused ultrasound (MRgFUS). These trials represent a growing interest in exploring MRgFUS as a therapeutic option for various neurological conditions, including movement disorders like cervical dystonia. Notably, three of these trials are currently active and recruiting participants, signifying ongoing research efforts in this field.
Two of the ongoing trials are being conducted by research teams with established expertise in X-linked parkinsonism-dystonia (XDP) and non-essential tremor (non-ET) syndromes. Their prior work in these areas provides a strong foundation for investigating the potential of MRgFUS in related conditions. The third active trial is specifically dedicated to evaluating MRgFUS for the treatment of cervical dystonia, directly addressing the objective of improving outcomes for patients suffering from this debilitating condition.
Interestingly, one trial has been completed, however, published outcomes are currently unavailable. This highlights the importance of continued data dissemination to fully understand the efficacy and safety profile of MRgFUS. The presence of multiple registered trials underscores the increasing recognition of MRgFUS as a promising non-invasive treatment modality for movement disorders.
Ongoing Trials for Cervical Dystonia
Currently, a dedicated clinical trial is actively investigating the potential of MRI-guided focused ultrasound (MRgFUS) as a treatment for cervical dystonia (CD). This trial represents a significant step forward in exploring non-invasive alternatives for managing this often-disabling movement disorder. The study aims to improve outcomes for CD patients by precisely targeting brain circuits implicated in the condition’s pathophysiology.
Researchers are meticulously monitoring patients throughout the procedure, utilizing MRI thermometry to track temperature changes at the anatomical target. This real-time monitoring ensures accurate and safe delivery of focused ultrasound energy. Clinical assessments are performed after each temperature increase to evaluate the immediate effects and identify optimal treatment parameters.
The trial’s design incorporates rigorous protocols for patient selection, treatment planning, and outcome evaluation. Investigators are hopeful that MRgFUS will provide substantial and lasting symptom relief, enhancing the quality of life for individuals with cervical dystonia. The results of this ongoing trial are eagerly anticipated by the medical community and patients alike, potentially paving the way for broader clinical adoption of this innovative therapy.
Previous Research: X-linked Parkinsonism-Dystonia & Tremors
Prior to dedicated cervical dystonia trials, research groups have extensively investigated MRI-guided focused ultrasound (MRgFUS) for other movement disorders, notably X-linked parkinsonism-dystonia (XDP) and various tremor syndromes. These earlier studies established the feasibility and safety of MRgFUS lesioning in deep brain structures, providing a crucial foundation for its application to cervical dystonia.
Published work from these research teams demonstrated successful targeting of the globus pallidus and subthalamic nucleus using MRgFUS, achieving symptom reduction in patients with XDP and non-essential tremor. These findings highlighted the precision and efficacy of the technique, showcasing its ability to modulate neural circuits responsible for movement control.
The experience gained from treating XDP and tremors informed the development of protocols and refined targeting strategies for cervical dystonia trials. Understanding how focused ultrasound impacts these related conditions has been instrumental in optimizing treatment parameters and predicting potential outcomes. This prior research underscores the potential of MRgFUS as a versatile tool for addressing a spectrum of movement disorders.
MRgFUS Procedure for Cervical Dystonia: A Detailed Look
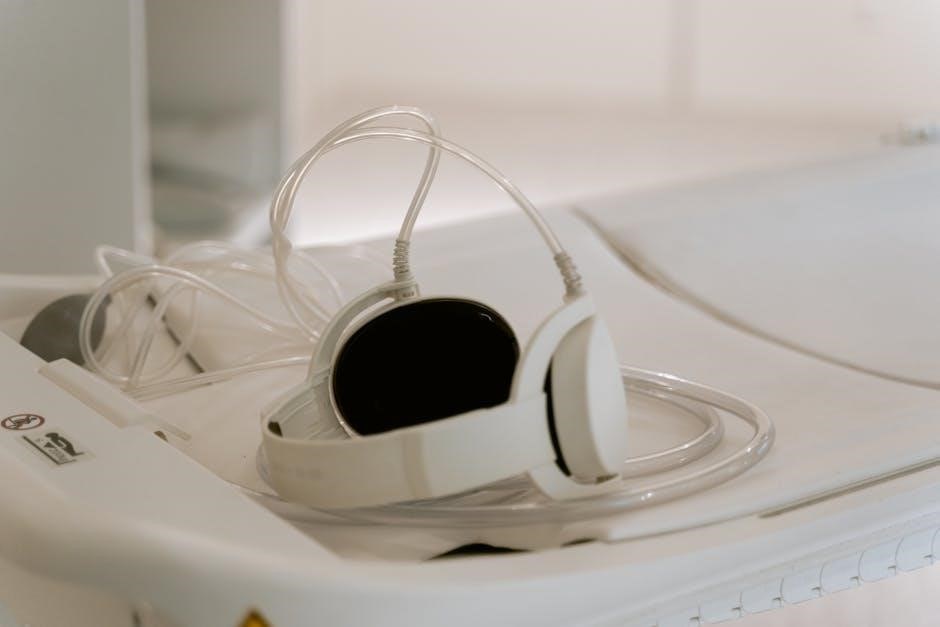
Patient preparation involves scalp shaving and cooling with circulating cold water, ensuring optimal sound conduction and mitigating heating effects during focused ultrasound application to target brain circuits.
Patient Preparation (Scalp Shaving & Cooling)
Prior to undergoing the MRgFUS procedure for cervical dystonia, meticulous patient preparation is crucial for optimal treatment delivery and safety. A key component of this preparation involves carefully shaving the patient’s scalp in the targeted area. This is not merely an aesthetic consideration; the removal of hair significantly enhances the transmission of ultrasound waves. Hair acts as an impedance to the sound waves, scattering and attenuating their energy before they can reach the intended brain structures.
Equally important is the implementation of a robust cooling system. Cold water is circulated over the shaved scalp throughout the entire duration of the procedure. This serves a dual purpose. Firstly, the water acts as a crucial sound-conducting medium, further improving the efficiency of ultrasound wave propagation. Secondly, and perhaps more critically, the cooling system mitigates the thermal effects resulting from the absorption of ultrasound energy by the skull. The skull absorbs a portion of the ultrasound energy, generating heat. Without adequate cooling, this heat could potentially cause thermal damage to the surrounding tissues. Therefore, maintaining a controlled temperature is paramount for patient safety and treatment efficacy.
These preparatory steps, while seemingly simple, are fundamental to the success and safety of MRgFUS for cervical dystonia, ensuring precise targeting and minimizing potential adverse effects.
Targeting Brain Circuits: Globus Pallidus & Subthalamic Nucleus
The efficacy of MRgFUS in treating cervical dystonia hinges on the precise targeting of specific brain circuits implicated in the disorder’s pathophysiology. Current research and clinical practice primarily focus on two key targets: the globus pallidus and the subthalamic nucleus. These deep brain structures play critical roles in motor control and are often dysfunctional in individuals with dystonia.
The globus pallidus, a component of the basal ganglia, is involved in regulating movement and suppressing unwanted motor activity. Lesioning the globus pallidus can help alleviate dystonic symptoms by disrupting these abnormal neural pathways. Similarly, the subthalamic nucleus, also part of the basal ganglia, plays a crucial role in regulating movement initiation and execution. Targeting this structure can modulate neuronal activity and reduce the severity of dystonia.
The selection of the optimal target – globus pallidus or subthalamic nucleus – is individualized, based on a thorough assessment of the patient’s specific symptoms and the underlying neural circuitry contributing to their dystonia. Precise MRI guidance is essential to ensure accurate targeting and minimize off-target effects, maximizing therapeutic benefit.
Temperature Increase & Clinical Monitoring
During the MRgFUS procedure for cervical dystonia, a carefully controlled temperature increase is induced within the targeted brain tissue – either the globus pallidus or subthalamic nucleus – to create a focused lesion. This thermal ablation is achieved through the convergence of focused ultrasound waves. Real-time MRI thermometry is paramount, continuously monitoring the temperature changes at the anatomical target with exceptional precision.
The temperature is incrementally increased, and crucially, patients are meticulously monitored clinically after each temperature increment. This allows clinicians to assess for any immediate neurological changes or adverse effects, ensuring patient safety throughout the procedure. The goal is to achieve a therapeutic temperature sufficient to create a lesion, while avoiding excessive heating that could damage surrounding tissues.
Continuous clinical monitoring involves regular neurological examinations, assessing motor function, and evaluating for any emerging symptoms. This iterative process of temperature increase and clinical assessment is fundamental to optimizing treatment efficacy and minimizing potential risks, tailoring the procedure to each individual patient’s response.
Outcomes and Future Directions
MRgFUS demonstrates favorable long-term outcomes in movement disorders, potentially extending to broader dystonia treatment applications, offering symptom relief and enhancing patients’ overall quality of life.
Favorable Long-Term Outcomes in Movement Disorders
MRI-guided focused ultrasound (MRgFUS) has already established itself as an approved and effective management strategy for several movement disorders, most notably essential tremor and Parkinson’s disease (PD). Numerous patients globally have experienced significant and, crucially, long-term benefits from this non-invasive therapeutic approach. This success provides a strong foundation for exploring its application to other debilitating movement conditions, such as cervical dystonia.
The existing body of evidence suggests that MRgFUS-induced lesioning can offer sustained symptom control, potentially reducing or eliminating the need for long-term pharmacological interventions, which often come with their own set of side effects. The precision afforded by the combination of focused ultrasound and real-time MRI guidance allows for targeted treatment of specific brain circuits – the globus pallidus, subthalamic nucleus, and motor thalamus – minimizing off-target effects.
While research specifically focused on cervical dystonia is still evolving, the positive outcomes observed in Parkinson’s disease, various tremor types, chorea, and other dystonias suggest a promising trajectory. The ability to achieve these results without the invasiveness of traditional surgical procedures like deep brain stimulation (DBS) represents a significant advancement in the field of neurosurgery and offers a valuable new option for patients seeking relief.
Symptom Relief and Quality of Life Improvements
The primary objective of employing MRgFUS for cervical dystonia (CD) is, naturally, to achieve meaningful symptom relief for patients. Early indications and extrapolations from successful applications in other movement disorders suggest a substantial potential for improvement. Patients experiencing debilitating head tilts, painful muscle contractions, and restricted movement may find significant benefit from targeted lesioning of the brain circuits involved in dystonia.
Beyond simply reducing the severity of motor symptoms, MRgFUS aims to enhance overall quality of life. By alleviating the physical discomfort and functional limitations imposed by CD, patients may regain greater independence in daily activities, participate more fully in social interactions, and experience a reduction in the psychological burden associated with the condition.
Clinical monitoring post-treatment, coupled with MRI thermometry to track temperature changes at the target site, allows for careful assessment of therapeutic efficacy. While long-term data specific to CD is still emerging, the favorable outcomes observed in related disorders suggest that MRgFUS could offer a durable and transformative therapy, empowering patients to live more fulfilling lives.
Potential for Broader Application in Dystonia Treatment
The encouraging results observed with MRgFUS in treating cervical dystonia (CD) naturally raise the question of its applicability to other forms of dystonia. Given that dystonia represents a heterogeneous group of movement disorders, each potentially involving distinct neural circuits, a tailored approach is crucial.
However, the fundamental principle of targeting aberrant brain activity with focused ultrasound remains consistent. MRgFUS has already demonstrated efficacy in treating movement disorders like Parkinson’s disease, tremor, and chorea by lesioning areas such as the motor thalamus, globus pallidus, and subthalamic nucleus. This suggests a potential framework for extending its use to other dystonia subtypes.
Further research is needed to precisely identify the optimal targets for each dystonia presentation. The non-invasive nature of MRgFUS, coupled with real-time MRI monitoring, offers a significant advantage over more invasive procedures like deep brain stimulation. Successfully broadening its application could revolutionize the treatment landscape for a wide range of debilitating dystonic conditions, offering hope to countless patients.